This is the recipe I use for cheesecakes. I’m doing this more for posterity; it’s been a while and this blog is a good way to keep track of details I might forget.
Shortbread Crust
1 Cup Flour
½ Cup Butter
⅓ Cup Icing Sugar
⅛ Teaspoon Salt
Cheesecake Filling
1 Kg Cream Cheese
1 ½ Cup Sugar
1 Cup Sour Cream
½ Cup Whipping Cream
¼ Cup Flour
1 Tsp Vanilla
4 Eggs
Making the Crust
In a bowl, add the flour, sugar, and salt. Mix them.
Add in the butter, and mix until the combination starts to become a paste.
Put the mixture in a pan. Use your fingers to spread the crust evenly, and a little up the sides. Poke holes with a fork, and then insert into the freezer.
Making the Filling
In a bowl, add the sugar and cream cheese.
Mix them until there’s no more loose sugar left.
Add in the whipping cream. Then start adding the eggs, mixing well after each one is inserted. Then add the sour cream, flour, and vanilla.
At this point it’ll be chunky from the pieces of cream cheese. I use an immersion blender to turn it into a uniform goo.
I set the oven to 350 F. I pull the pan out of the freezer and pour the mix into it.
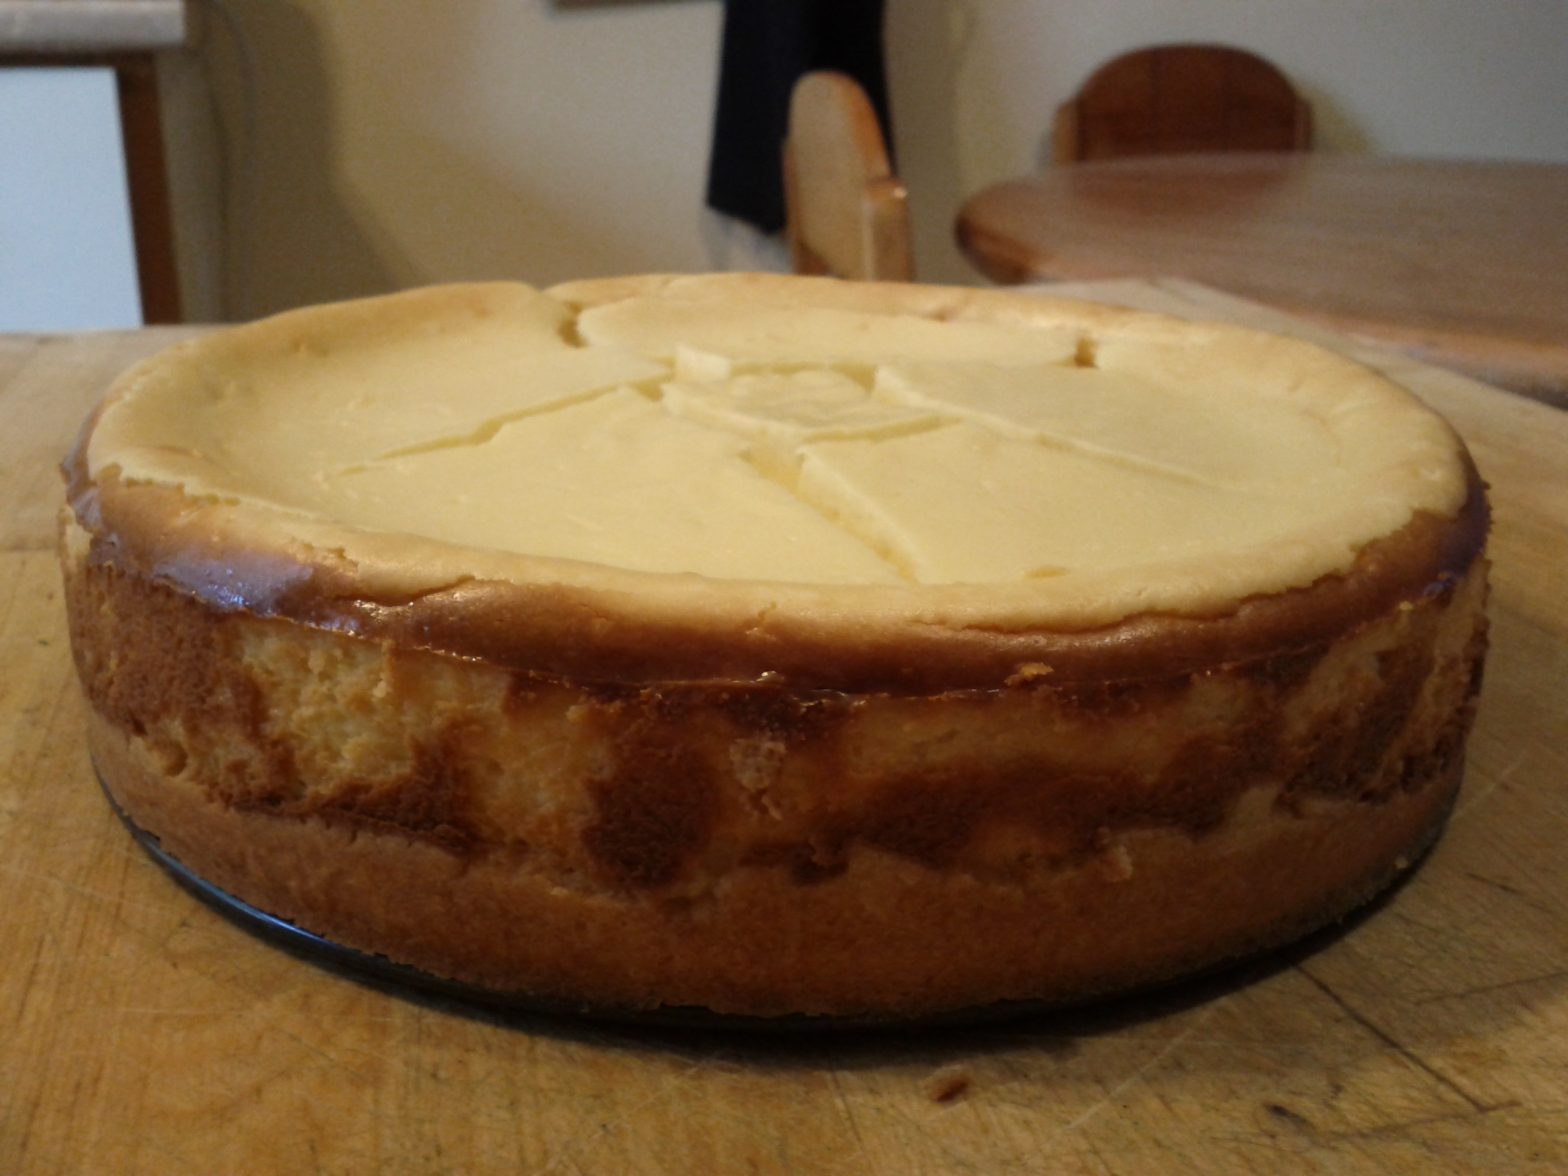
I wait for the oven to heat up to reach temperature and insert the pan. I bake it for 1 hour, or until the top has started to turn a nice golden colour. I then leave it in with the oven turned off for another few hours before putting it in the fridge overnight (or five hours.)
Note: To avoid cracking like above, I started putting in a pan with water in it in the oven when I insert the cheesecake. I remove the pan with the water after 30 minutes of baking.
Well, my first month of school is coming to a close and I’m drowning.
It’ll be better next semester, when I won’t have any more chemistry labs to do. That class is an unbelievable time sink, I figure I must spend 30 hours on it alone in the last week. Top that with work and three other classes that all have their own lectures, readings, assignments, discussion groups, and lab sessions. It’s a lot!
When I do have spare time, I bake. It doesn’t require thinking. It produces instant results. I end up with goodies. It’s unlike anything I do in university. On that note, I’ve been trying to find a baked doughnut recipe. I’ve tried four of them.
Pictured above is the result of a baked French Crueller recipe. The inside was as you’d expect – soft and fluffy. The outside was tough, a product of baking instead frying. It wasn’t terrible, but I don’t think I’d do this one again.
Next up was a yeast-based baked doughnut recipe. The end result was very dense, almost bread-like. I’m not sure if this was because of the recipe, or because of my (lack of) skills. The nice thing about that recipe though is that it doesn’t require a doughnut pan. Not bad, but not quite doughnut-like.
I then stumbled on a new recipe. I had the bright idea of trying it while significantly inebriated. The result tasted like baking powder. My ability to measure quantities is always the first casualty of my alcohol consumption.
I promptly tried the new recipe for baked doughnuts again, albeit after sobering up. I also picked up a doughnut pan for this one. The results were great. This was it! A baked doughnut that rivalled the fried variety.
I’m going to keep trying new recipes, but I’m really content with this last one.
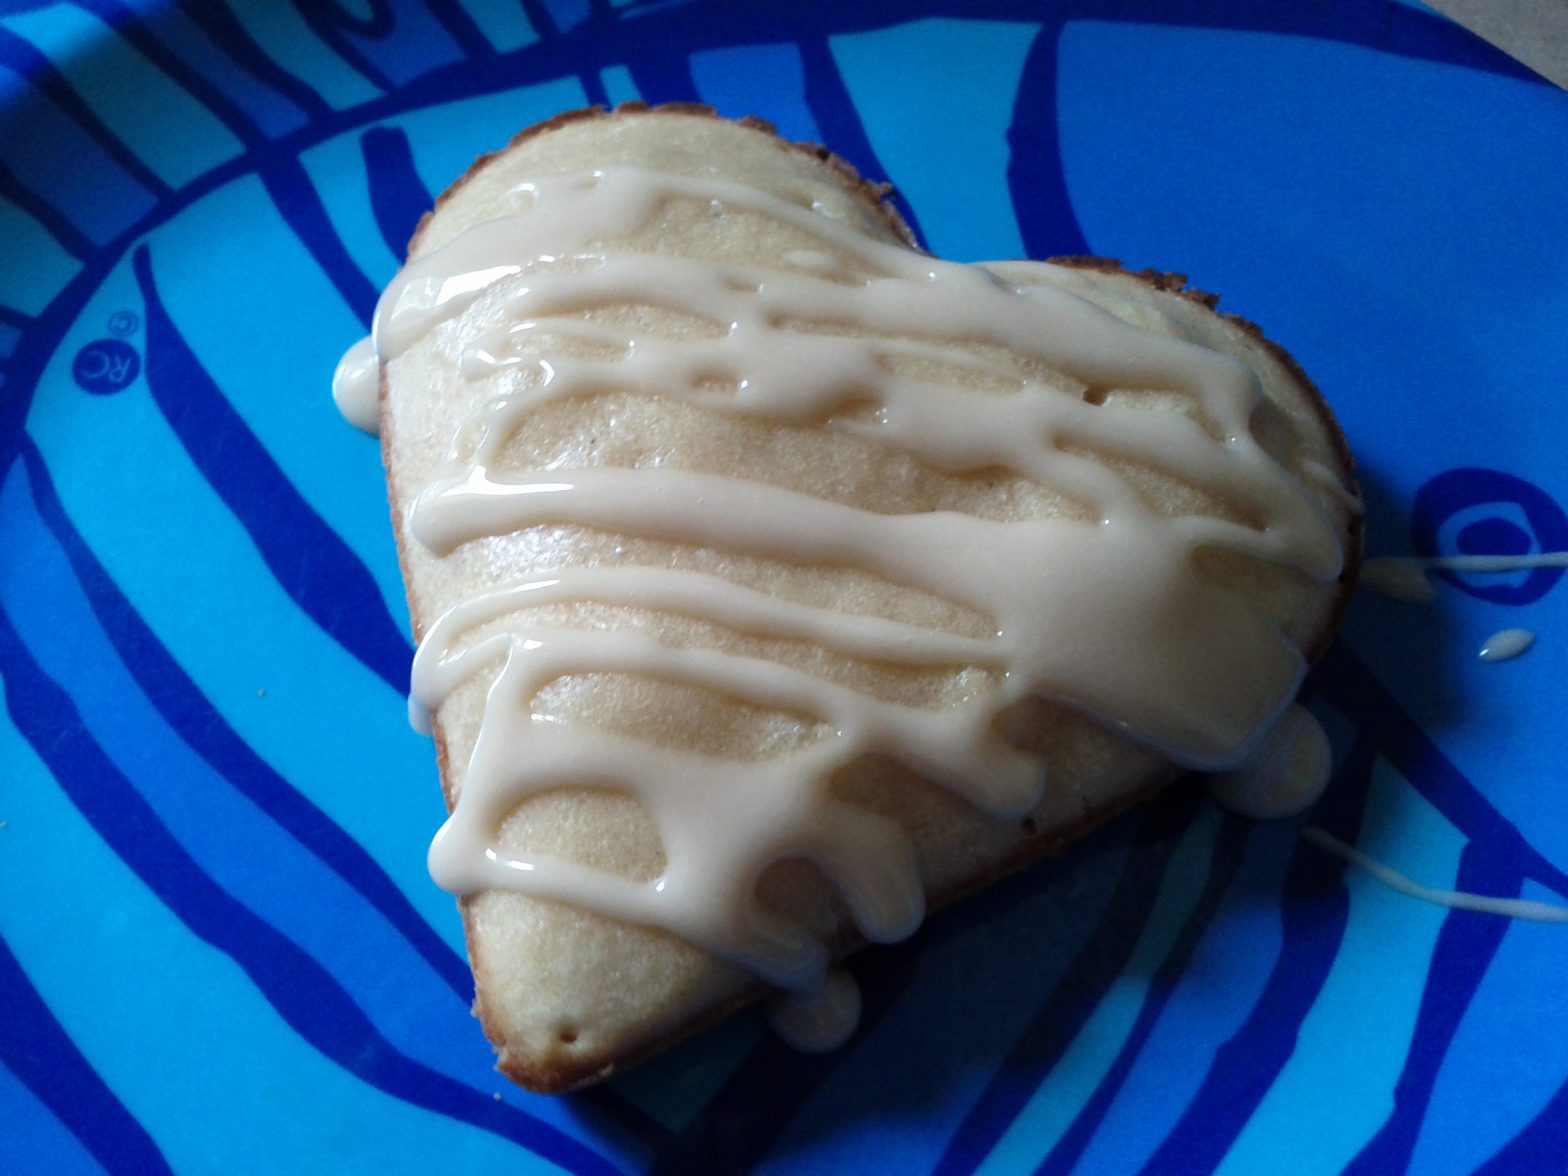
Update #1: I’ve tried a recipe for baked snickerdoodle doughnuts, pictured below. Good results but I have to say that I still prefer that other recipe.
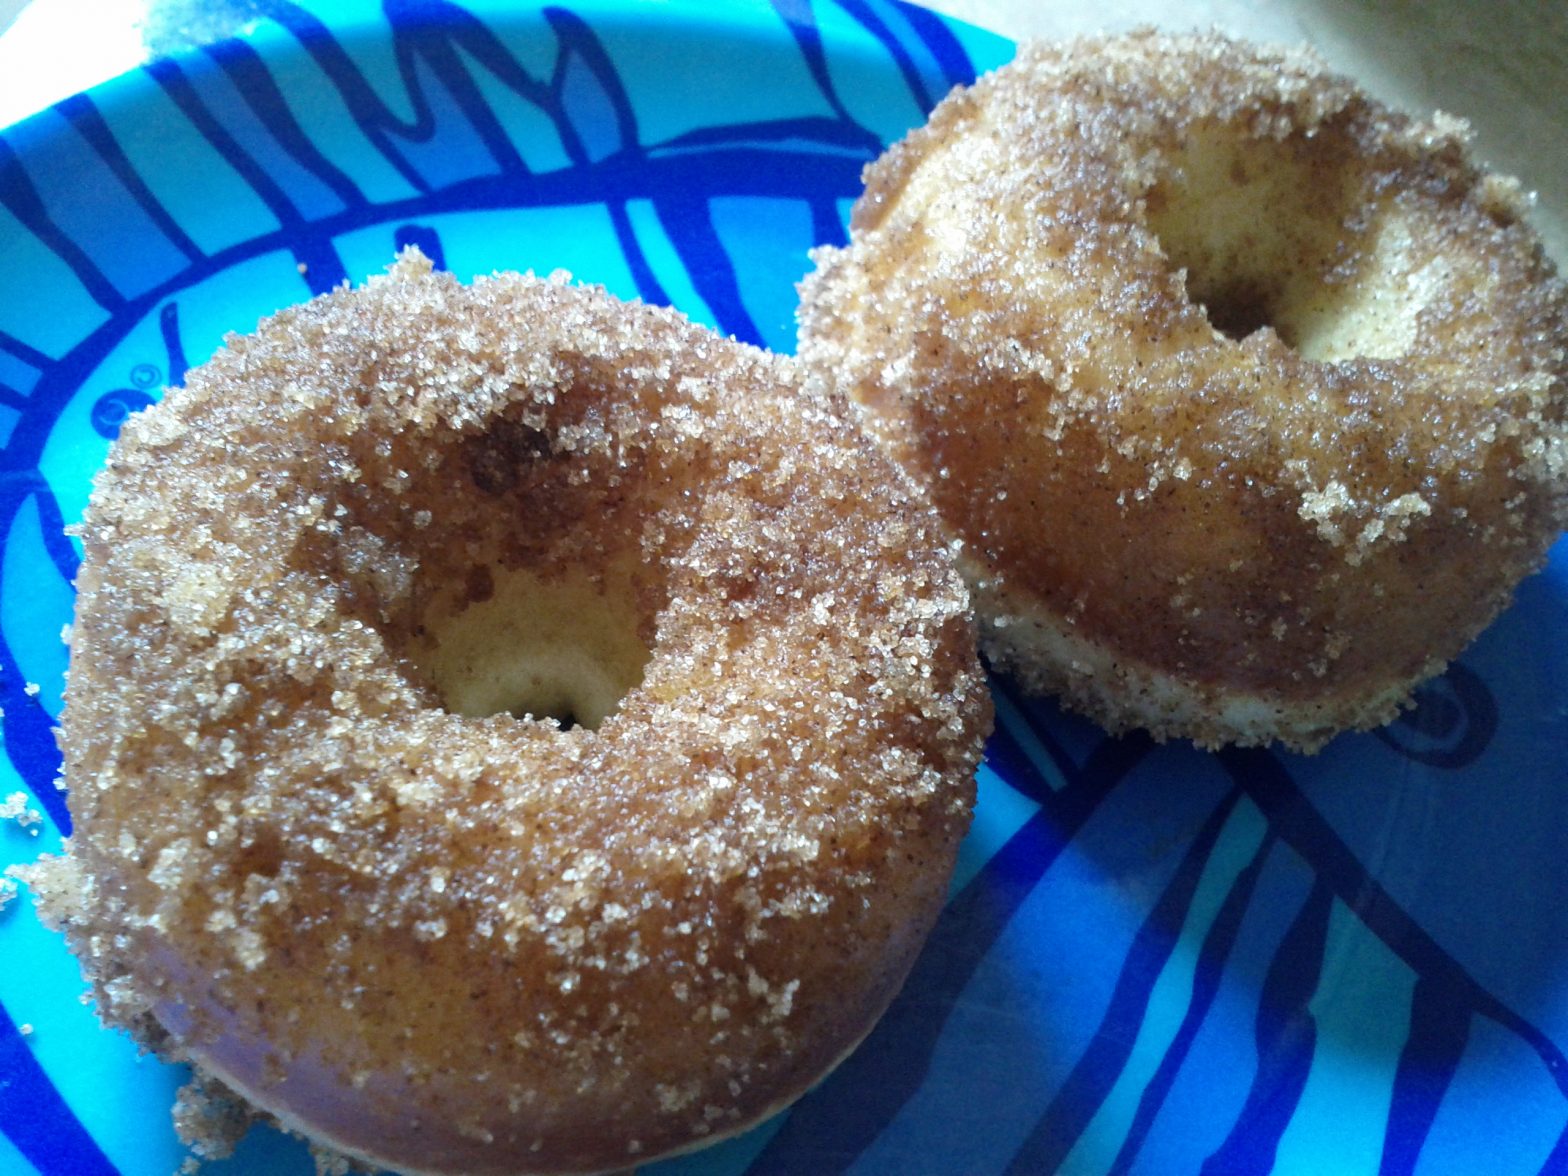
Update #2: I made cinnamon roll doughnuts, shown below. The flavour, which really is reminiscent of a cinnamon roll, makes this one a keeper.
Update #4: I used the topping from the baked cinnamon roll doughnuts, and used the batter from the cinnamon & sugar baked doughnuts. It’s an excellent combination. It fills out nicely and melts in your mouth as you chew into it. The batter doesn’t absorb the cinnamon roll topping as well as the original recipe though, so it’s not as eye-catching. But there are ways to deal with that.
Update #5: I made vegan gluten-free doughnuts. I followed the same recipe as above, but made substitutions. Flour became Red Mills Gluten-Free All Purpose Flour with two tsp of xanthan gum. Eggs became apple sauce. Butter became Earth Balance spread. Milk became almond milk. Cream Cheese became Tofutti Cream Cheese.
Update #6: I used an entirely new recipe, for baked cake miniature doughnuts. The doughnuts ended up with a crispy sugary exterior that clung to the pan and a cake-like interior. Not bad, but not the best I’ve done either.
Update #7: I made vegan baked maple cinnamon roll doughnuts. They have been the best doughnuts to date. I basically took the cinnamon roll doughnut recipe, made it egg and dairy free, then topped it with a maple vegan cream cheese icing.
Update #8: I came across a recipe for baked chocolate doughnuts. I halved the portions, which turned out to be a good call as it made 12 mini doughnuts. The end result was pretty decent; they were like bite-sized chocolate cakes.
Update #9: I made vegan baked maple doughnuts. The recipe was very similar to the vegan cinnamon roll doughnuts, and turned out absolutely delicious. This one is now in my top two doughnut recipe list, along with the said cinnamon roll doughnuts.
Update #10: I took the baked maple doughnuts recipe and made it gluten-free. I personally prefer the gluten-rich version, but it’s still very delicious!
Update #11: I made chocolate glazed doughnuts. The result was very cake-like taste and texture. Pleasing but not very doughnut-like in that respect.
Update #12: All the recipes thus far were used with a miniature doughnut pan, with twelve cavities per tray. For this new recipe I utilized the full-size pan, with six doughnuts per tray. I made whole wheat cinnamon sugar doughnuts, substituting Greek yoghurt for sour cream because that’s what I had. These were very good and a definite keeper as a large doughnut recipe.
Update #13: I made vegan brown butter cinnamon sugar doughnuts. They were tasty, being dipped in melted brown butter meant that that was a part of the flavour. Similar to one of the first recipe I ever tried which also dipped the doughnuts in melted butter; hard to say which is better.
Update #14: I made a veganized version of pumpkin spice doughnuts. They were soft and more chewy than cake-like, but nonetheless flavourful and decent.
Update #15: I made vegan cookie dough doughnuts. The recipe for the doughnut portion did not call for any sugar, and on their own tasted very drab. It was just a delivery system for the rich and yummy cookie dough topping. The topping was good, but nonetheless, I don’t think I’d make these again. Or maybe use a different recipe for the doughnut portion, and tone down the topping.
This was also my first day of university. I got my books, my student card, and checked out events on campus. Tomorrow will be an introductory session for my department and classes start on Wednesday. I’ll also try to get some work done.
With that, the amount of time that I’ll have to devote to experimenting with food will likely be drastically slashed. From 8:30am until 6:00pm six days out of seven, I’ll be either at work or school. For that seventh day, I’ll spend half a day at my work place.
If I have time in-between classes, and all my homework is done, I’ll either telecommute to work or spend some time on this creative endeavour I’ve been meaning to get to (I’ll leave the details of said project for another blog post.)
Anyways, given the expected cutbacks in culinary exploration, I figured this would be a good time to share what have been my favourite recipes over the past little while.
First on the list would be the cinnamon sugar pull-apart bread. The best way to describe it is to say that eating it is like picking away at a huge Cinnabon.
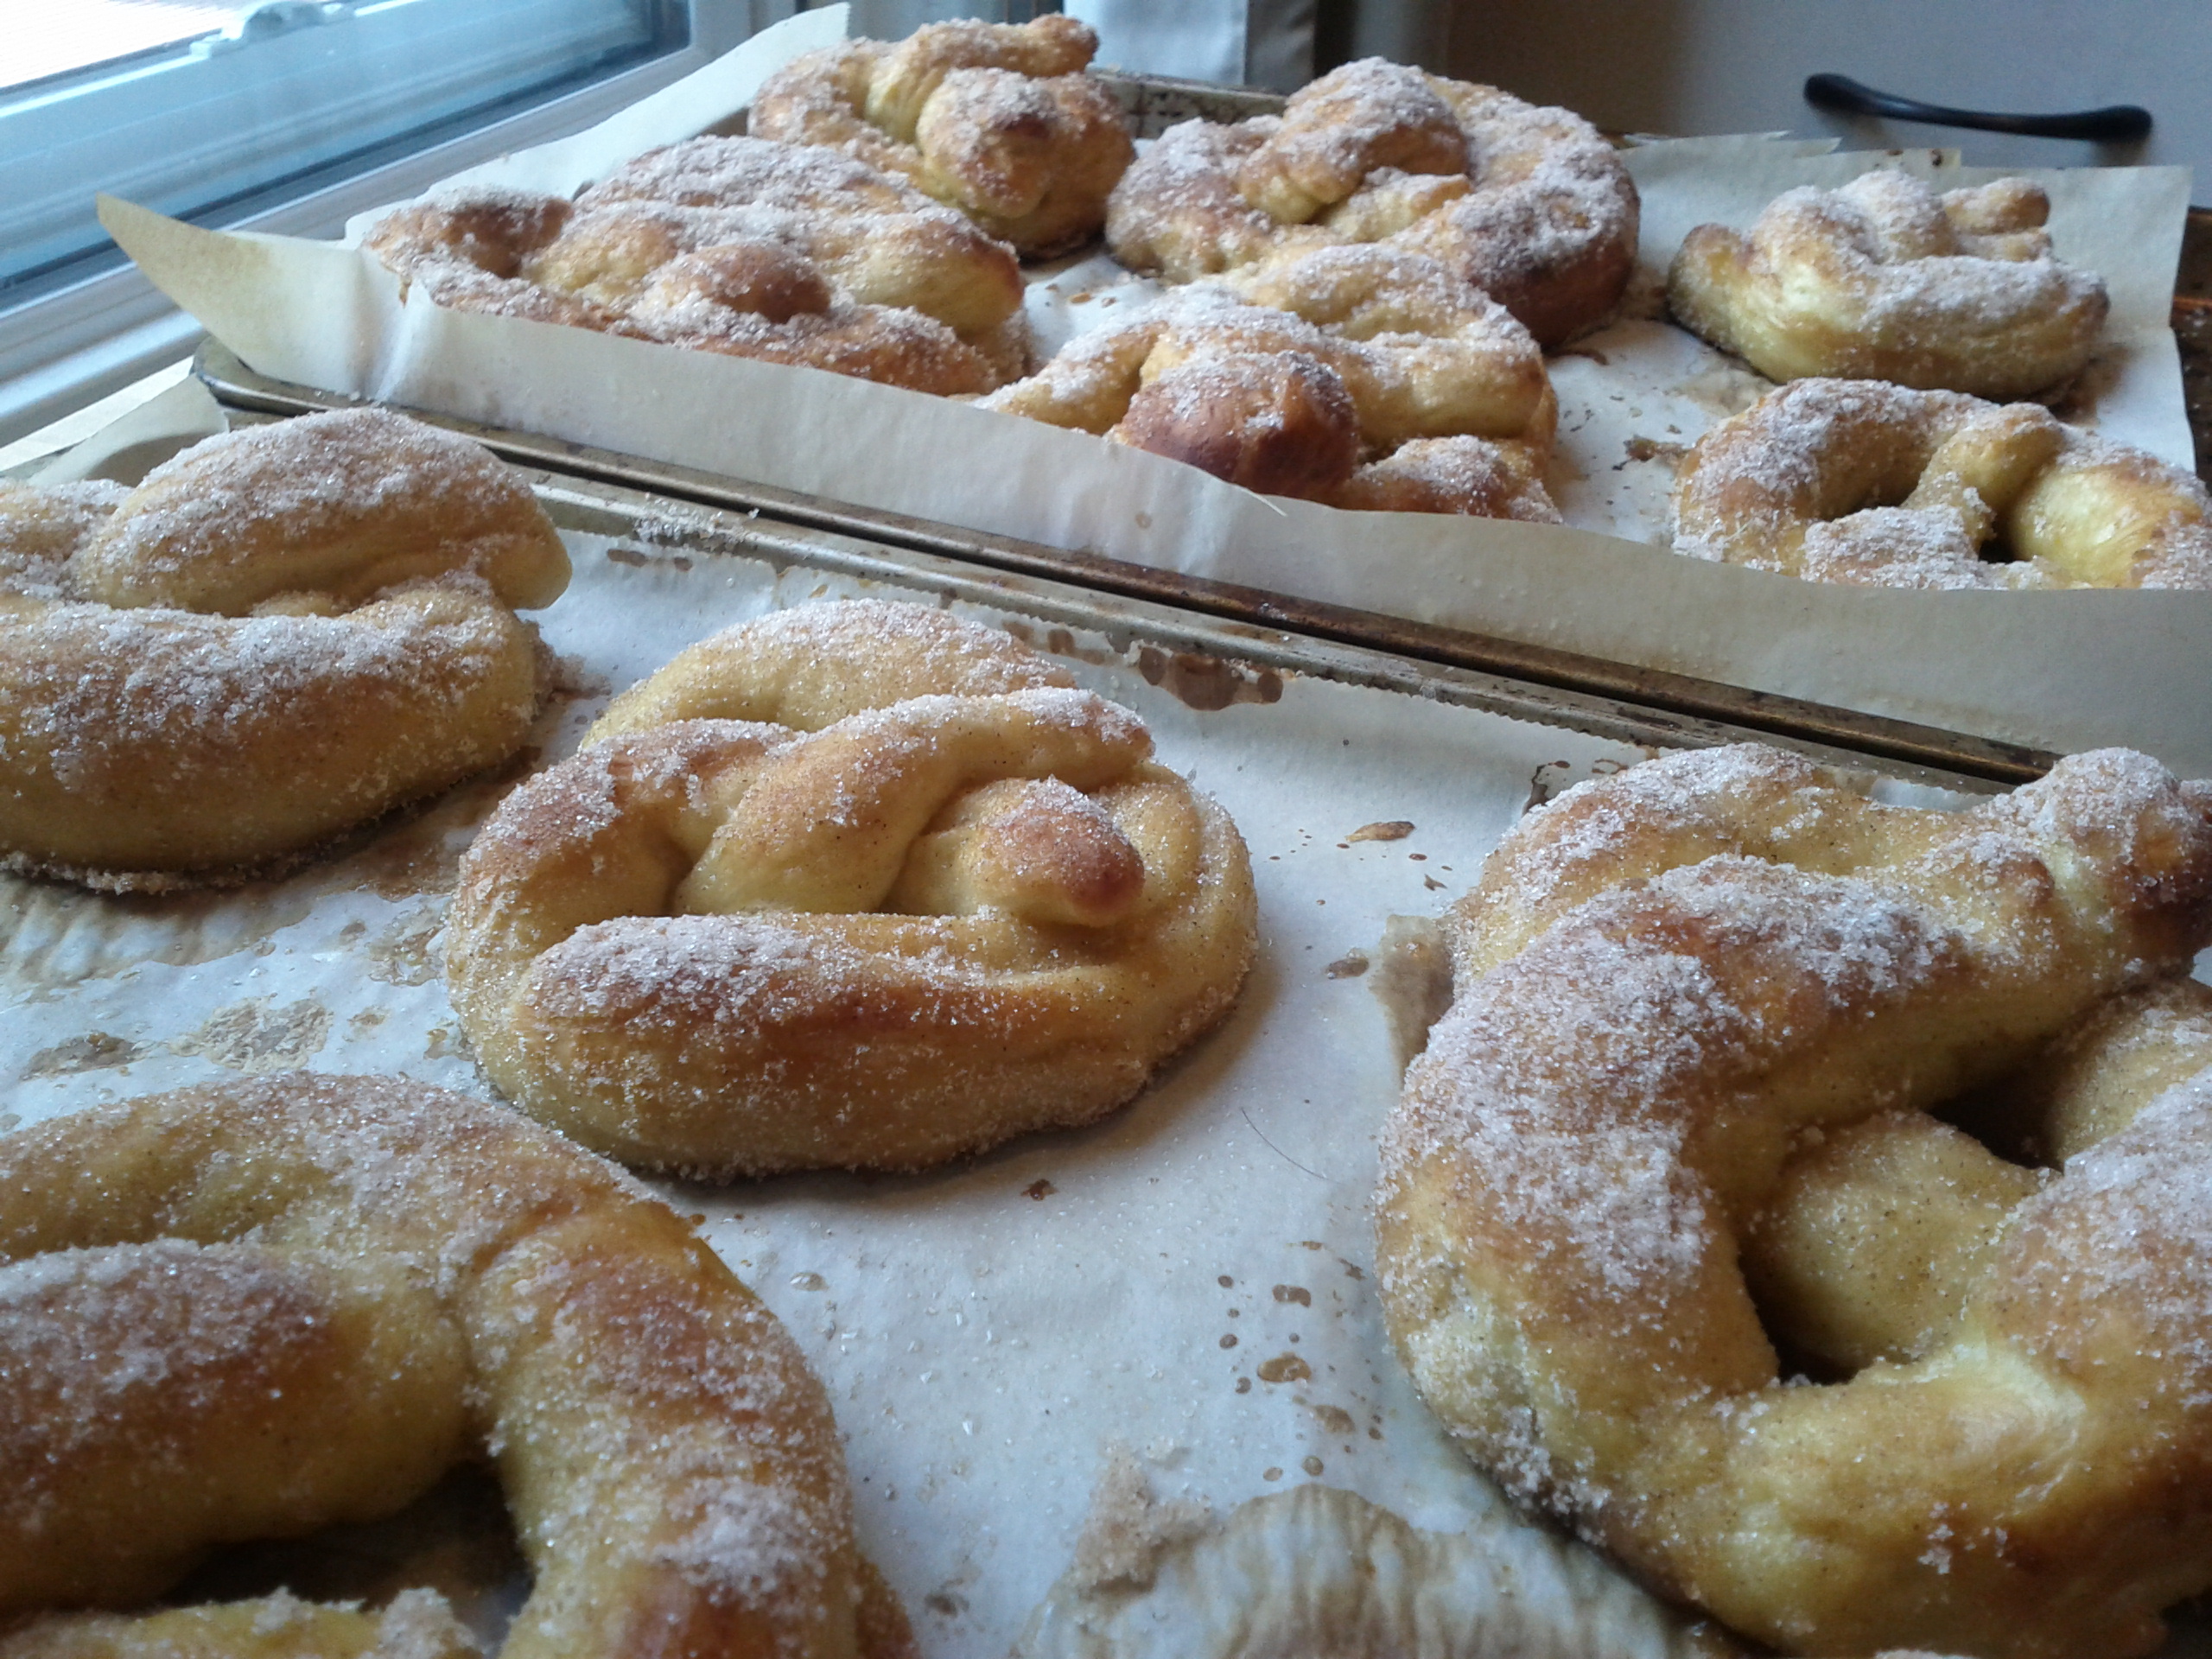
Next on my list would be the soft cinnamon sugar pretzels. I’m not a big fan of pretzels, but this to me didn’t taste like the ones I had before. It tasted more like a doughnut from Suzy Q. I have more pictures about my effort to make them here.
As a funny aside, it was interesting to see how I’d grown since the last time I had my university ID photo taken. The anxious me who had just turned 18, living at home, and relieved at having made a friend during the campus tour. Then the me of today, confidently navigating the adult world as a sea of kids take their own first steps in the path to personal freedom.
Whatever happens in these next few years, it ought to be interesting.
The other day, I spent a few hours at Chapters looking through their cookbooks.
I’ve been trying to find a guide to teach me how to cook, rather than hand me recipes. I don’t like the recipes found in most books because they tend to call for a bunch of expensive ingredients I’d only ever use the once. This just doesn’t work for me. I’d much rather the ability to look at what I have on hand, and figure out from there how I can combine them to produce something edible.
The exception for me has been baking and grandmother recipe books, which tend to reconstitute the same few set of ingredients in imaginative and delicious new ways. If you dear reader have any recommendations on good learning materials, I would love to hear them. Tina suggested the cooking show Good Eats with Alton Brown, which I’m absolutely loving.
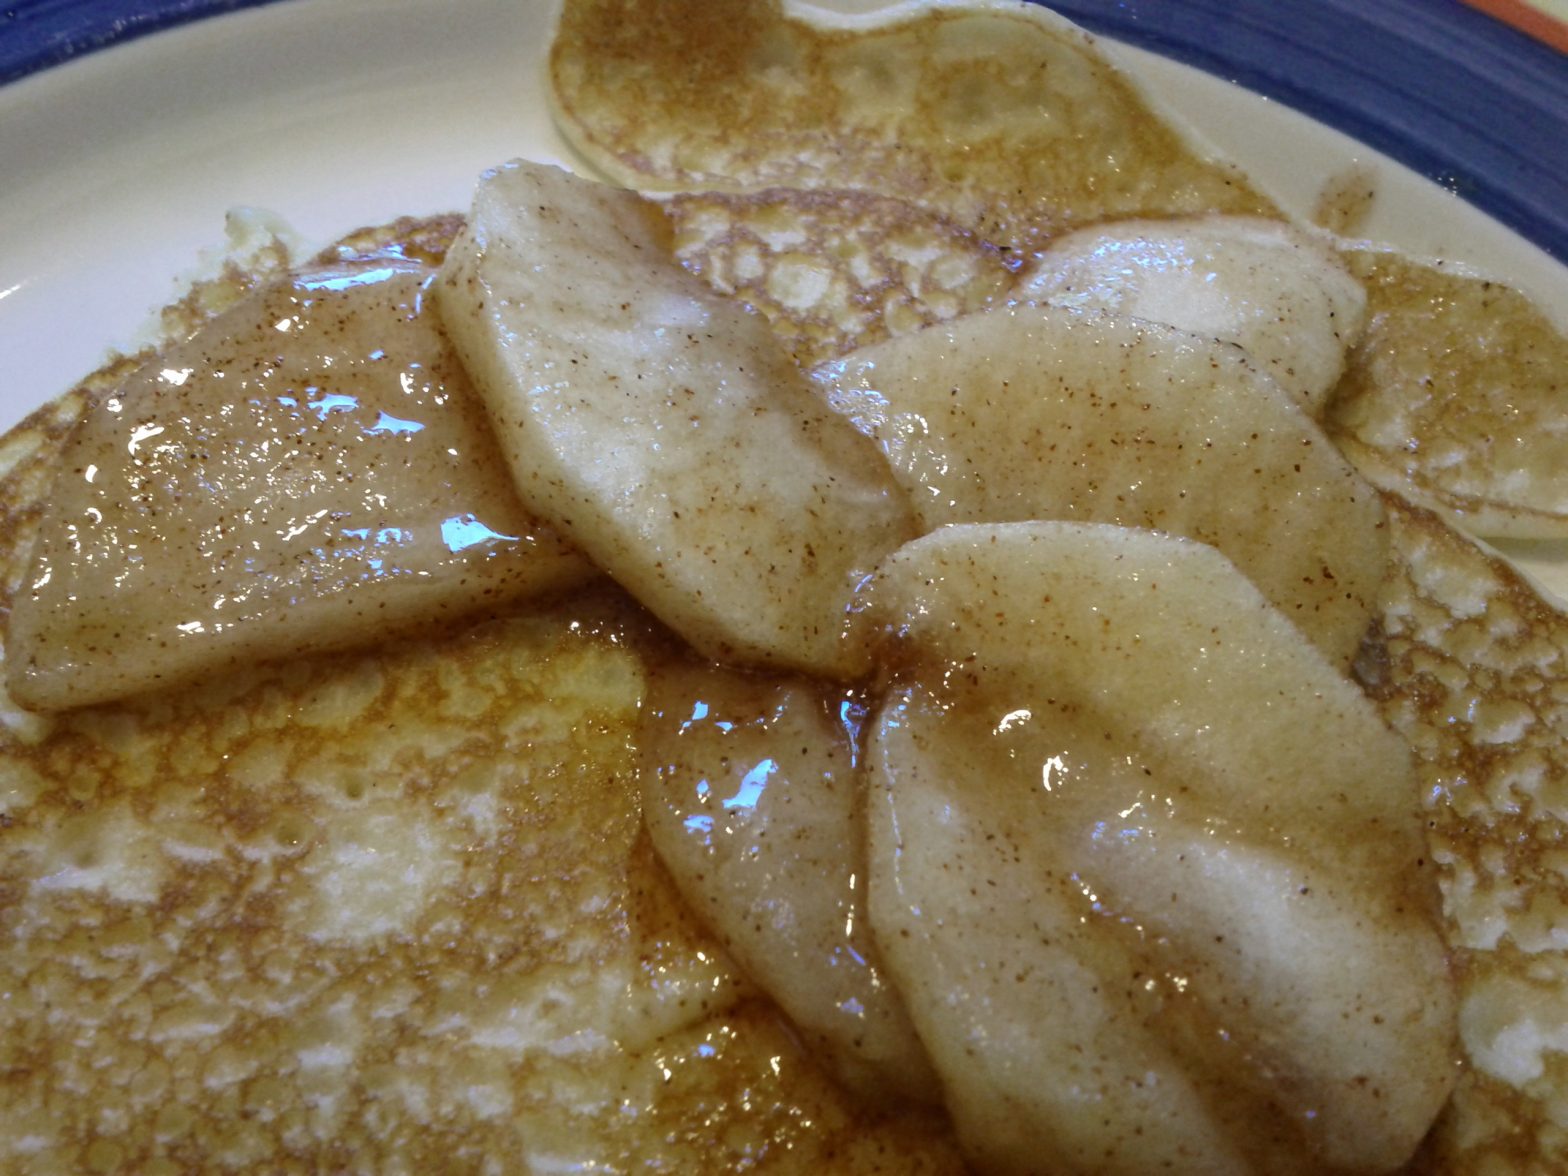
Anyways, back at Chapters. I was paging through a bunch of books and stumbled on a really neat recipe idea: apple pie pancakes. So I promptly took a photo of the page with my phone and went home to give it a shot.
It did not turn all that well. It was supposed to be a pancake with apple pie filling on top, but I ended up with it all mixed up together. The way they did it in the book was to cook it all in a single pan, so I decided to rework the recipe and use two pans.
I wrote directions for myself and tried it again this morning. Much better: delicious and pleasing to the eye. I’ve included them below, but can be summed up as made apple pie filling, dumped it on a pancake.
Apple Pie Pancakes RECIPE
This makes two servings. Approximately 450 calories per serving.
Summary: First, we’ll prepare two bowls worth of stuff. One bowl will contain the apple slices, the other, the pancake batter. We’ll then dump the contents of these bowls into separate pans and allow them to cook. Once the contents of both pans are cooked, we’ll combine the two on a dish and serve.
Ingredients:
1 Apple
1 Egg
1/4 Cup Milk
1/4 Cup Flour
4 Tbsp Butter
2 Tbsp Sugar
1/2 Tsp Cinnamon
Apple Slice Bowl: Take two tablespoons of sugar and put it in the bowl. Add 1/2 teaspoon of cinnamon and mix it well with the sugar. Peel an apple and cut it into slices, then throw the slices in the bowl. Mix the apple slices with the cinnamon sugar concoction so that all the slices get coated.
Batter Bowl: Add 2 tablespoons of butter to the bowl. Microwave the bowl for 15 seconds to melt it. Add the 1/4 cup of flour, and mix it with the butter until it forms a paste. Add the egg and mix it until it’s a single consistency. Add the milk and mix it again until it’s uniform.
Pan #1: Put the pan on medium-low. Add 1.5 tablespoons of butter, and wait for it to melt and bubble. Then add the apple slice mix including any cinnamon sugar left in the bowl. Stir and flip the slices occasionally.
Pan #2: Once the first pan has been cooking with the apple slices for a few minutes, set the element for the second pan to medium-high. Add 1/2 a tablespoon of butter on the pan, and move it around to coat the entire surface. Wait a few minutes for it to melt and bubble, then add half the batter. Wait for it to solidify, then flip it. Take it out and put it on a plate when it becomes golden with brown spots on top. Add the second half of the batter and repeat.
Finishing Touches: Add the apple mix to the top of the pancakes and serve.
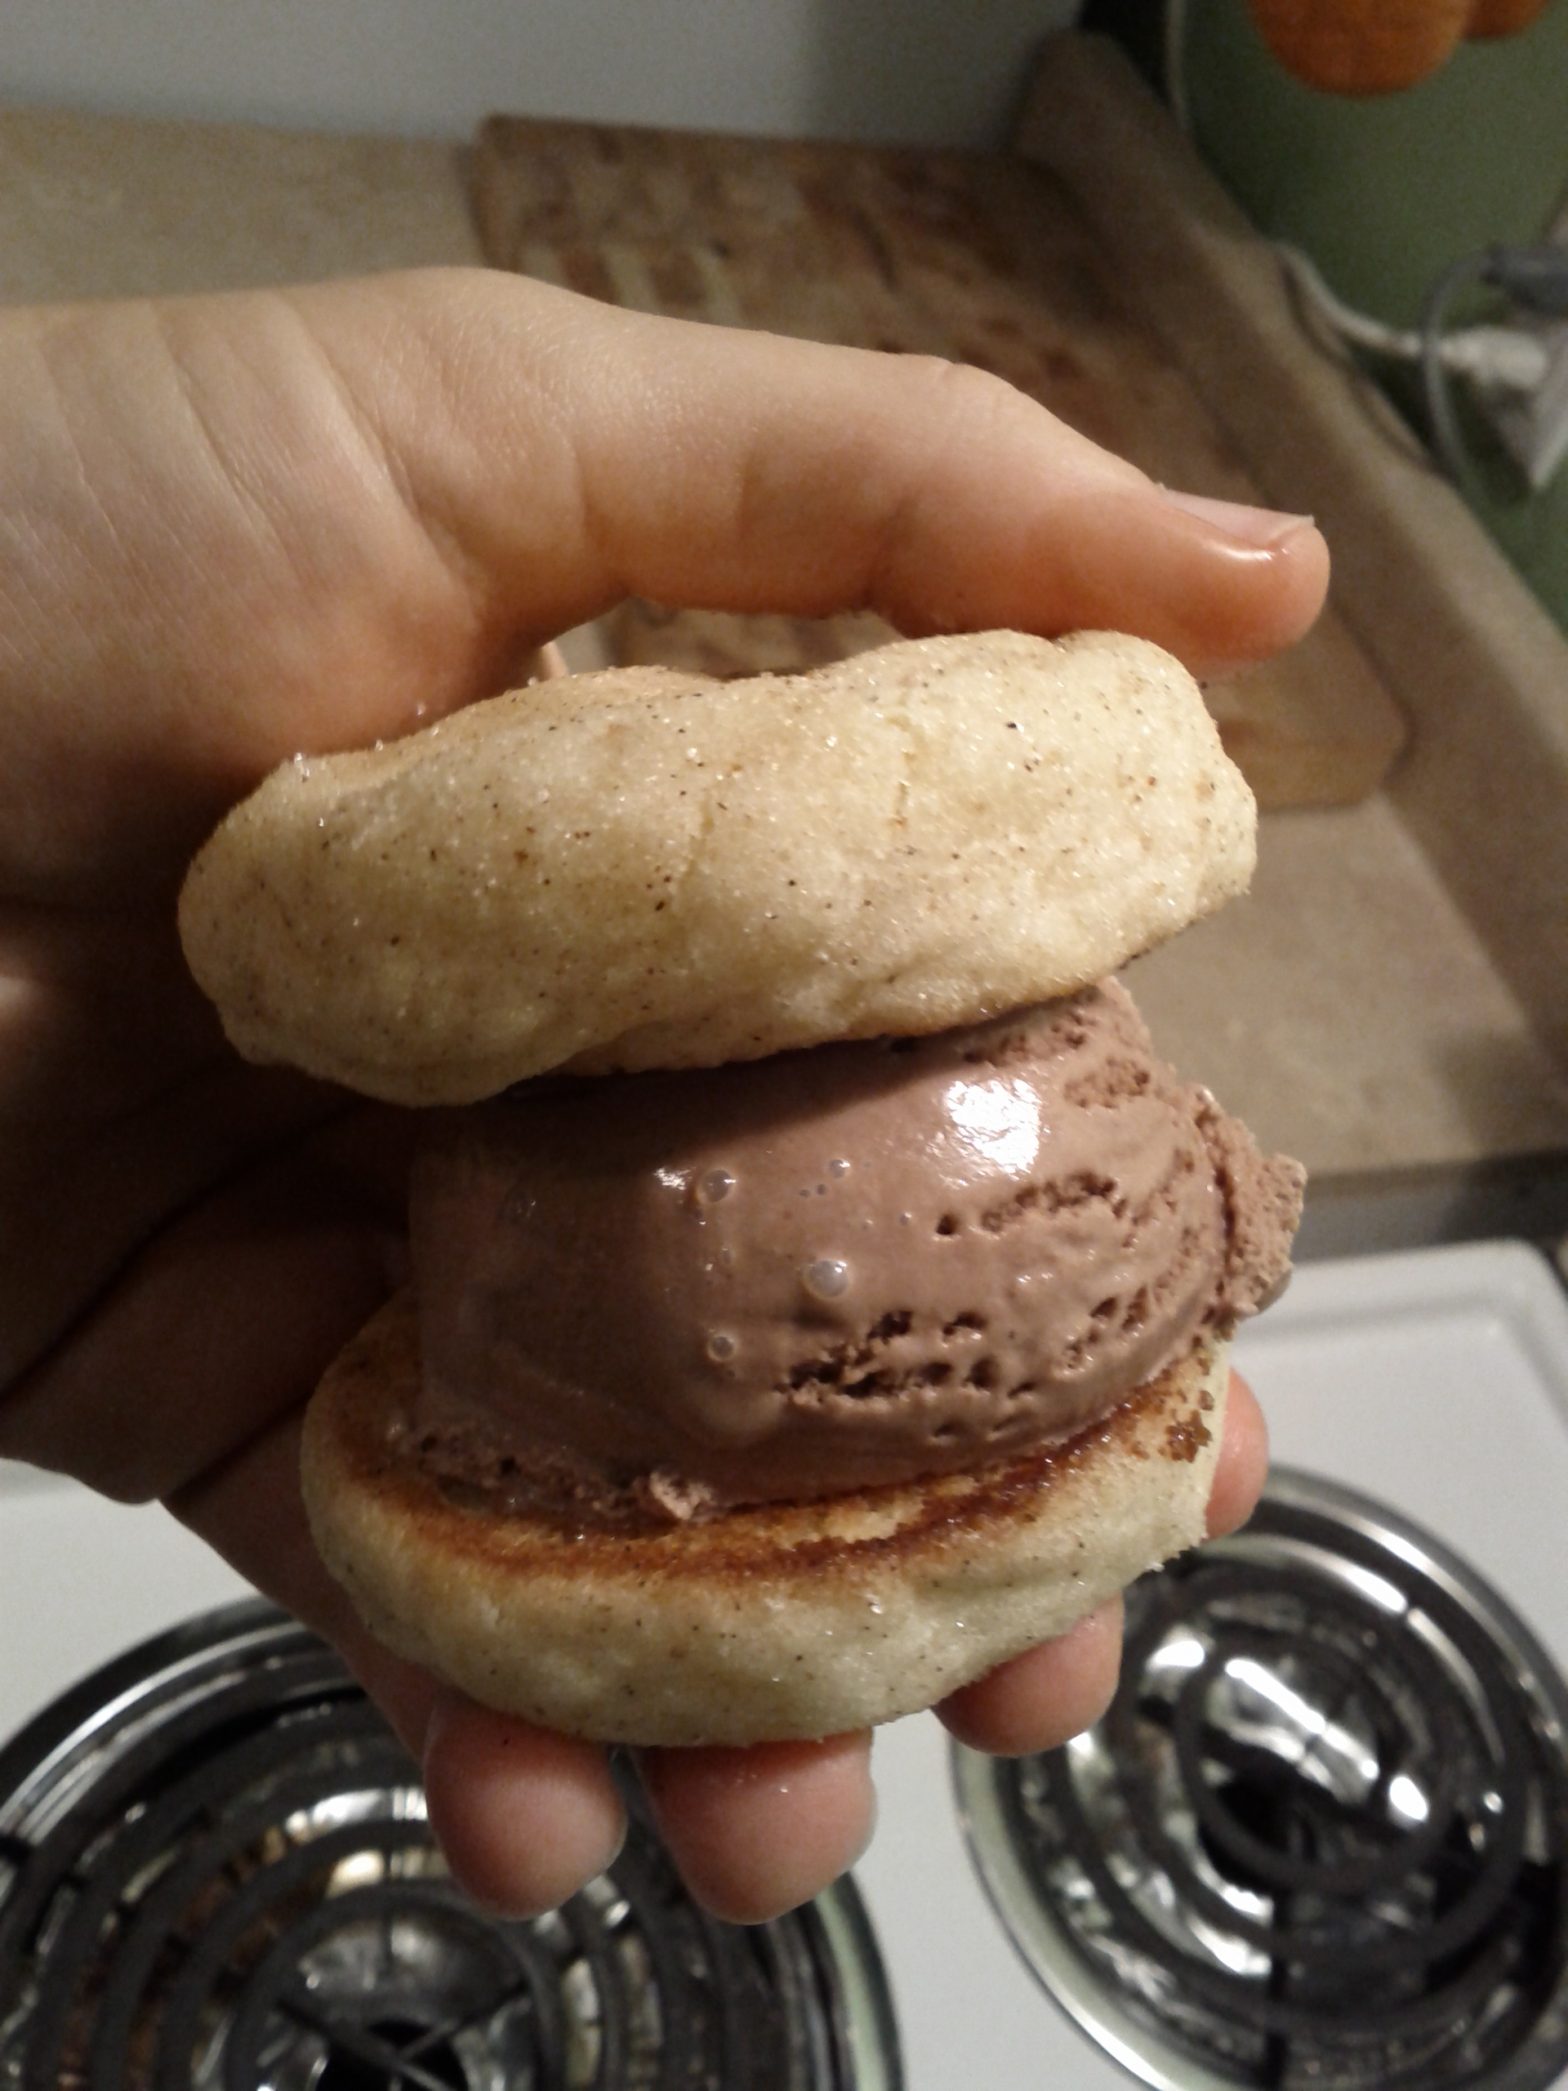
I made a snickerdoodle ice cream sandwich today. I used the snickerdoodle recipe from Betty Crocker, substituting 3 tsp of baking powder for the cream of tartar and baking soda. I also substituted vegan buttery spread for the shortening and butter. This latter substitution wasn’t for any culinary reason; I just always buy that stuff rather than butter.
I was quite happy with the results. I also made two attempts at cinnamon biscuits. I used a recipe from a card I found tucked away inside one of my books. The first turned out like little bites. I had rolled the dough in a rectangle and cut thick (inch long) pieces.
For the second go-around, I rolled the dough a square and cut it up thinner.
Cinnamon Biscuit Recipe
Ingredients:
2 Cups Flour
3/4 Cup Milk
3/4 Cup Sugar
1/2 Cup Butter
1/4 Cup Vegetable Oil
1 Tbsp Vinegar
1 Tbsp Baking Powder
1 Tsp Cinnamon
1/4 Tsp Baking Soda
Instructions:
Put the vinegar in a measuring cup. Then put in the milk to the 3/4 line. Leave for five minutes.
Combine the flour, baking powder, baking soda and salt in a bowl. Mix it.
Add in the vegetable oil and the vinegar/milk concoction. Mix it all in until it has the same consistency.
Put flour on a surface, and place your dough on it. Roll it out until it’s about 40cm long and 20 cm wide.
Put the butter in a bowl, and microwave it for 45 seconds.
Lather the now melted butter on the rolled out dough.
Mix together the sugar and cinnamon. Sprinkle it on top of the melted butter.
Set the oven to 400F.
Slather a bit of butter on a cookie sheet to grease it.
Roll up the dough.
Cut up the roll in 2-3cm pieces. Put the pieces, exposed face up, on the cookie sheet.